What Tap Teachers Can Learn From Ballet Class
When it comes to dance training, ballet is second to none. Let’s face it, ballet is hard.
Ballet’s uncompromising focus on technique is the reason that it is considered the root of contemporary dance.
Turnout, one of the most basic techniques taught in the first year, can become something that even seasoned dancers obsess about their entire lives. Ballet’s reputation is held to such lofty regard that for a dancer to claim proficiency in any ballet style (Cecchetti, Vaganova, RAD) they must submit themselves to a strict certification program.

Less popular than "Cecchetti" is the "Horrible Nightmare Creature" method.
Ballet training produces results, and it’s time that tap dancers should be asking what they can learn from ballet class.
What I love the most about taking a ballet class is the emphasis on basic technique. If your knees move forward during a plié then you will hear about it. If your center (abdominals, obliques, lower back) isn’t tight expect a quick poke in the tummy from the teacher. Take a class from Joel Hall at Chicago’s Joel Hall Dance Center and get poked in the gut repeatedly while having the words “tight tummy” burned into your memory.
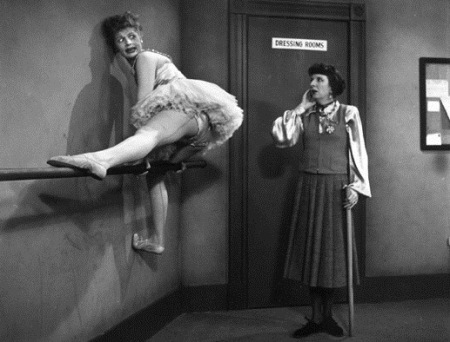
Her teachers have some 'splaining to do.
Having strong basic technique is accomplished by sheer force of will, and means having integrity and respect for your dance. Unfortunately, it is something that is often skipped in many tap dance curriculums. I have taught teenage students who boast about having studied tap since they were three years old yet have flaps that look like jetés and instead of weight change I get wait…change.
The good news is that it is never too late to work on the basics. That is why I have taken four technique issues that have become highly developed in ballet curriculum – position of the feet, tension in the knees and ankles and proper posture – and have modified those issues for tap dance.
(These basics are also illustrated in the accompanying video found below.)
A good place to start is from the ground up. More specifically…
1. Train Feet to Stay in Parallel Position![Soles of Feet IMAGE The bottoms of two feet, side-by-side IMAGE]()
For tap dance the optimum position for a dancer’s feet is in parallel. In ballet, parallel is known as sixth position and is generally reserved for low level classes. There is a good reason for this.
Any and all possible movement occurs on three planes: the sagittal plane (front and back), the frontal plane (to the side), and the transverse plane (rotation). When the feet and legs are in a parallel position, they are operating on the sagittal plane, which is the most efficient plane to use.
To test this theory try walking up a flight of stairs sideways.
Most of our important day-to-day activities occur on the sagittal plane, including walking, running, opening doors, kicking a football, etc. That is because the sagittal plane is incredibly sturdy, and movement on the other planes is generally more difficult (go ahead, try the sideways stair climbing).

Mike - "Hey, Bill, remember the other night when you asked me for the definition of the sagittal plane?" Bill- "Leave me alone, Mike."
Students of dance that are taking tap concurrently with ballet have a high tendency of turning out their feet during tap. This leads to imbalances of swinging the body back and forth during basic exercises such as flaps across the floor or stationary rolling shuffles. Even in a step like wings, where the legs move out to the side, the feet should stay parallel to hit the scrape on the side of the front tap.
Checklist:
- Make sure that feet are both pointed to the front and are shoulder-width apart.
- Maintain this parallel position, even when doing a step out to the side or behind the other foot (like doing a shuffle behind the supporting leg).
- Use the mirror. During an alternating step like rolling shuffles (shuffles that alternate from one side to the next using a step/weight change) the head should remain stationary and not move from side to side.
2. Keep Your Ankles Loose
From day one of ballet class, the student is taught to engage their ankle. Point your foot, roll it down into the ground, press your heel down, etc. It’s not only ballet; jazz and contemporary also stress this technique. Sloppy pointed feet are a real deal breaker when it comes to a dance performance, and strong ankles are reinforced for good reason. However, this constant reinforcement causes a lot of difficulties for the tap dancer.
Dancers with tension in the ankles will find that their shuffles and flaps make unpleasant scraping noises, that their feet don’t leave the ground on aerial steps like pullbacks and that wings are not only impossible, but painful as well. All these problems stem from the habit of constantly pointing the feet any time the leg muscles become engaged. Ballet puts a strong emphasis on how clean a dancer’s “lines” are, and after years of ballet training it is easy to consider the foot, ankle, and the rest of the leg as one as one rigid structure.
Tap dance rarely considers the ankle, and when we do it is usually about how to NOT use it. The majority of the actions that a tap dancer performs originates at the knee and hips. A back brush of the toe doesn’t come from depressing the ankle down, but by swinging the whole section of leg under the knee backwards. The first scraping sound of a wing isn’t produced by the foot scraping the toe, but by a loose ankle rolling over from the outward force originating from the hip.
Checklist:
- Take a deep breath and focus on relaxing the ankles specifically.
- Stretch the ankles by pointing, flexing, and rotating the foot, though no more than you would for any other dance form. Ankles are naturally flexible, unrestricted by bones and muscles, and can be damaged by superfluous stretching.
- Use imagery: Picture the mechanics of the knee and/or hips during a step. By diverting your focus, you may “forget” about the ankles, thus relieving tension.
3. Bend Your Knees
In every dance class you hear the same thing: “Don’t forget to bend your knees.” In tap dance, this takes on a whole different meaning.
The position of your knees has a dramatic affect on your feet and, in particular, the heel. When recovering from a plié, the ballet student is taught to straighten the legs and press the heels into the floor. This is a very important point and can mean the difference between great technique and sloppy technique. Unfortunately, tap dance is almost the direct opposite.
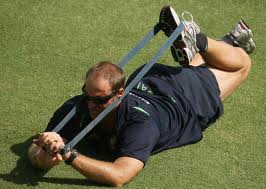
"I know I said to BEND your knee but... Look, maybe tap dance just isn't your thing."
The rule for the knee in tap dance is to get it over the toes. Providing that your ankles are left loose and relaxed, a cool thing should happen: your heels will lift up. While maintaining that stance press a heel into the floor and then release it. The heel will pop back up thanks to the natural elasticity of your body. Not only are your tendons doing 50% of the work, but now that heel is prepared for whatever is coming next.
Now try very lightly dropping a heel with a straight leg. Not only is dropping onto a straight leg bad for your knees, but think of all the muscles that had to be used to accomplish one heel drop.
Checklist:
- Bend the knees over the toes until the heels raise slightly off of the floor.
- Practice pressing and then disengaging the heels. Now try right to left. How quickly can you alternate your heels?
- Use the mirror. The head should remain stationary. If the head is bobbing up and down during the exercise then you are going into relevé. Keeps those knees bent and ankles loose!
4. Posture
Imagery has always been helpful to me, particularly in regard to posture. For ballet I picture an imaginary pole entering the top of my head, moving straight down my spine and exiting parallel to my legs. As I have a tendency to round my shoulders, a quick “pole” check in the mirror is a great help.
For tap dance the same model can be used.
Begin with the imaginary pole running parallel inside your body. While maintaining good posture (shoulders back, pulled in center, etc.) bend the knees, move the hips back and the chest forward. The final position should be imagined as the pole entering your back at the knob found atop the spine and below the neck (the 7th vertebrae of the cervical curve of the spine) and exiting the sternum, the concave “dip” above your abdominals and between the pectoral muscles.
Hitting good tap posture can be harder than it sounds and leaning forward does not translate to round shoulders and a soft center. Though the center of gravity changes, all other rules regarding good posture still apply. Another useful practice in imagery is to think about sitting in a chair. Bring a chair onto the dance floor and face it to the side. Note in the mirror how your body looks during the process of sitting before you are about to relinquish control to gravity. That’s good tap posture. (Tip courtesy of Ted Louis Levy.)
Yet ANOTHER good practice in imagery is perhaps my favorite (because it rhymes): Keep your nose over your toes.
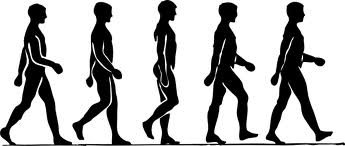
Tap dance more closely follows the natural movement patterns of the body. When we walk, we anticipate our next step. If you freeze mid walk when your weight changes to the front foot from the back, you will notice that your head is past your foot. Without this natural change in the center of gravity the weight change would not be quick enough, and as soon as that back foot comes up, the body would not have sufficient weight forward to support a vertical position.
Some imagery is less imaginative than others.
Take for example the difference between normal walking and military marching movement patterns. When marching, the knees and legs first move up and then down, whereas a normal walking gait moves straight down and into the floor. When doing flaps across the floor, it is common to see students who extend the non-supporting leg (the one doing the flap) up and out, similar to a battement, tendu, or jeté, before bringing it down to the floor, giving the dancer the appearance of marching.
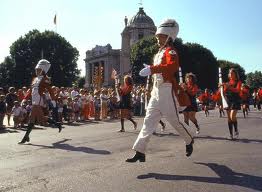
Flaps should mimic walking by going down into the floor.
Checklist:
- For good tap dance posture, bend your knees and move your torso forward and your hips back while maintaining a strong center.
- Use imagery like the imaginary pole, nose over your toes, or almost sitting in a chair.
- Use the mirror: Try walking normally for eight counts and then doing flaps for 8 counts. The head, back, and knees should all function similarly to your normal gait.
- Use your ears: Generally a flap has the accent on the second sound of a flap; be sure you are doing a “fl-AP,” as opposed to “FL-ap,” unless otherwise instructed by a teacher or choreographer.
Get it Right the First Time
In tap class, both the teacher and the student can become so overly focused on the steps that it is easy to overlook the key principle that guides most dance curriculums.
A strong foundation with universal rules that apply to all aspects of the dance are often left out of tap class. In their place we have a lot of repetition that reinforces bad habits. Here is where we can take a lesson from ballet class to quash bad habits before they even begin.
Finding these concepts hard to imagine just by reading? Here is my corresponding video that illustrates the points discussed in the article. Thanks for watching!
Watch this video on YouTube.


